How to start with LinkDeli: a step by step guide
This guide will help you set up your LinkDeli account and create stunning visual product lists, connected to your favorite shops and multiple affiliate networks.
App Registration
For your registration, you will need only three elements: a name (1), an email address (2) and a password (3)
Note: Even if you are an old user of the Inlinkz Project Manager, you'll need to register from scratch, since LinkDeli is hosted in its own domain. Please do create the account with the same email you used for Inlinkz.

Login
After activating your account, login in with your credentials.

Settings
At the top right of your screen, nearby your email address, extend the little green arrow and click on your account "Settings".

Enter the email address you have registered with (1) and your Blog URL (2).

Shops
Since LinkDeli is an affiliate-optimized service, at first, you'll need to be an affiliate partner with shops. This will allow you to use your own affiliate agreements to earn money from your product lists. For example, if you are an affiliate with say, SimonSaysStamp (through ShareASale), LinkDeli allows you to create links to that shop, with your affiliate ids so, with each sale you generate, you earn your agreed-on commission.
To create the connection with a shop, go to the Shops menu at the top of your dashboard and click on the configure button on the right side of the shop you are already an affiliate. This is a process you need to do only once for each shop you are an affiliate of.

Add the affiliate id (1) you'll find on your affiliate account. This allows LinkDeli to automatically convert any link that belongs to a shop you have configured to an affiliate one. Without an affiliate ID you cannot search in the shops (You will need to add the shop links with the bookmarklet or the "add link" button).

You can optionally set a tracking and/or a banner ID there (2) as well.
See an example below:
If you are affiliate with Shareasale, you will fill the "affiliate id" field which you can find on your ShareASale account, right at the top of your screen, as soon as you login:

If you enter a tracking ID as well, you could be able to view the reports on Shareasale and distinguish where the click came from.
Your Shop
The shops you selected have now moved under Your shops menu.

Lists
Now you have configured your shops, go to the Lists menu and Create (your first) product list

Enter a title for your list (1) and click to Create (2)
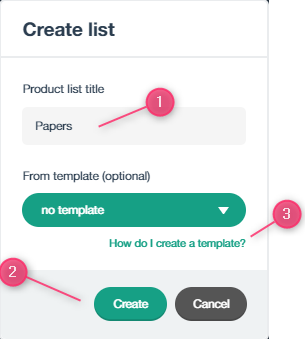
Note: Any product list can be set as a template list(3). Find out how you can use a list as a template here.
Search for a product
Once you click on the "Create" button, you will be directed to the search board to look for your desirable products.
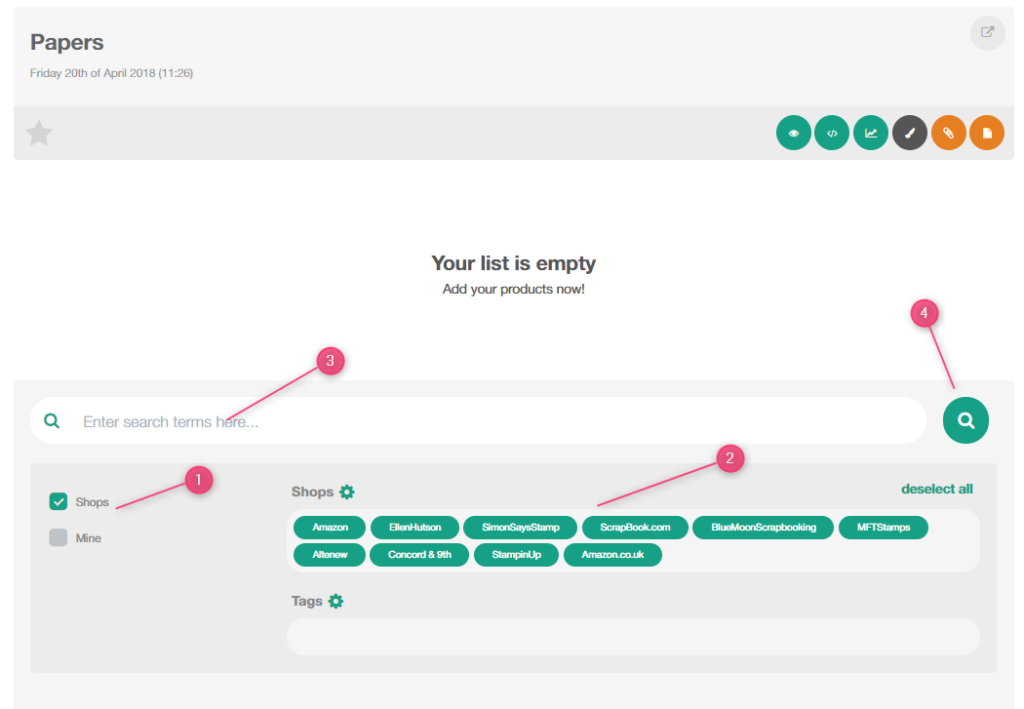
The Shops checkbox (1) will be checked by default and all the shops you have configured will be displayed on the shop bar (2). Keep only the shops you would like to search in, enter a keyword on (3) and click on the search icon (4).
It should bring up the relevant products.
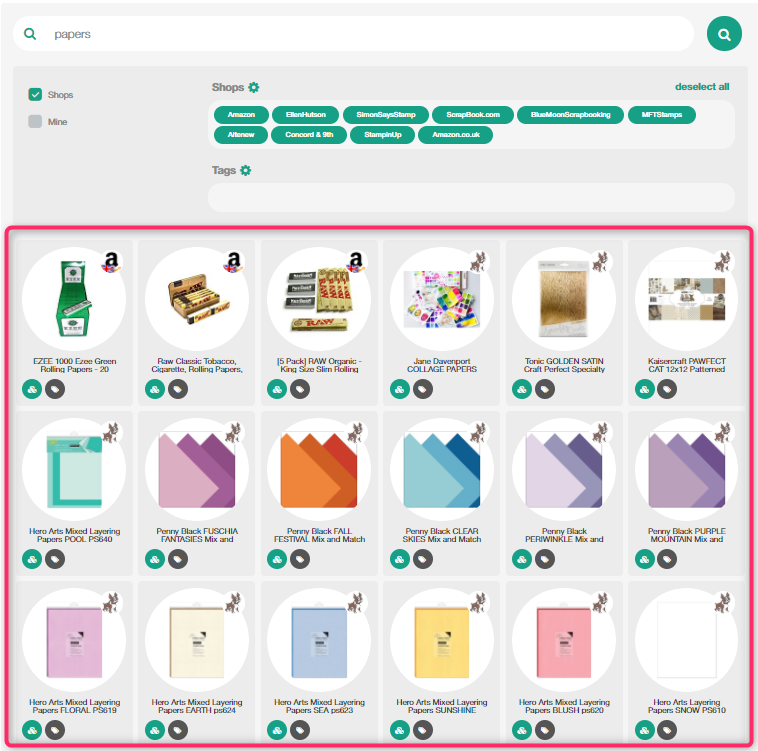
Click on the products you desire and they will be added to your list at once.
You are done! Your first product list has been created.
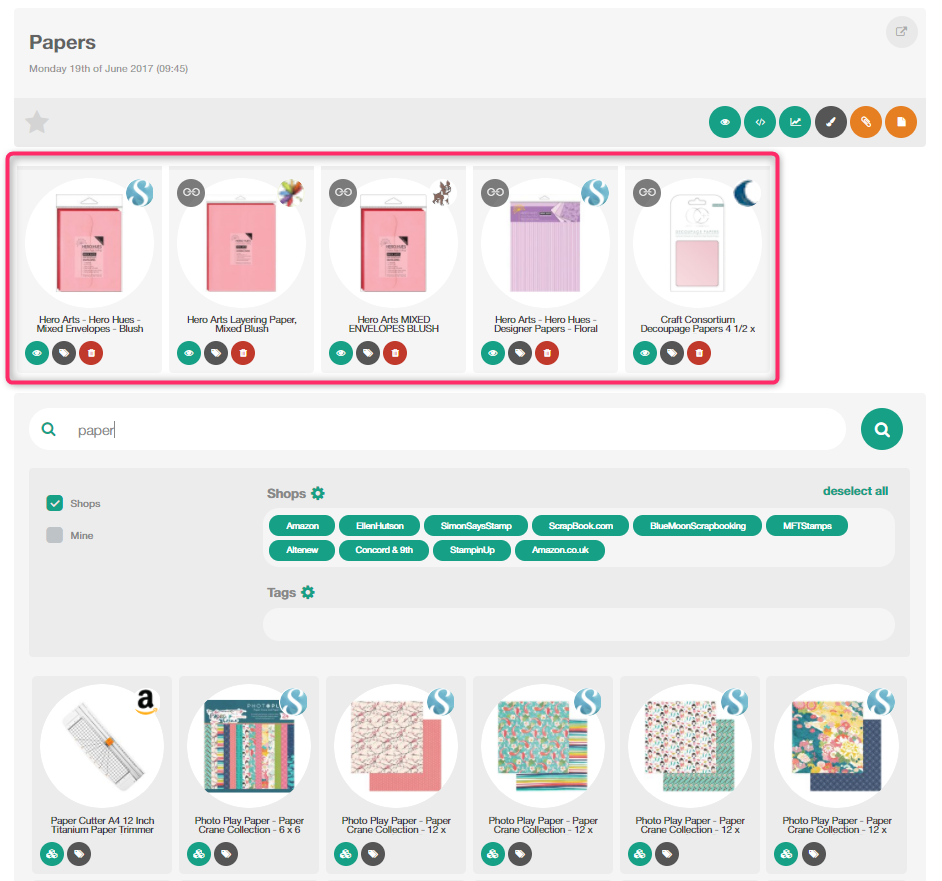
After you have created the widget, preview it (1) and check if any changes are required, tag a product (2) (read more about tags here) or delete it using the trash can button (3).
If no more changes are needed, click on the web code button (4), grab the appropriate code for your blog, YouTube channel or for a html text (find out more about the codes here) and paste it in your post or underneath your video to display your list.
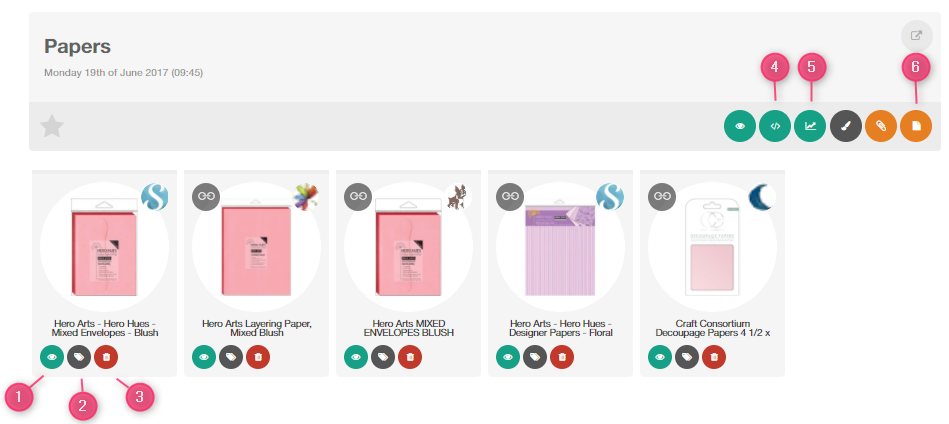
Click on the statistics tab (5) to view the total list clicks and select the (6) tab, if you want to use this list as a template and have a starting point for your next lists.
Note: While on preview, click on some of your links to verify that the tool is adding properly the affiliate.

Join product
You can join products together by clicking on the chain icon on the boxes.

Every group of join products is marked with a distinct background color.

After products are joined, the check-boxes will look like this:

Note: Drag an image to change the order in the list.
In your dashboard, when you have multiple shops per link, an icon shows up instead of repeating the product icon:

Go back to the Lists and your product list will be shown with all the products links you have selected.
You can preview your list (1), edit it (2), copy the widget (3) and view the stats (4) from this field as well.
If you want to use this list on another project, just click on the (5) to clone it (find out more about the utility of the clone feature here). Of course, you can always delete a list from (6).

Use the pagination section at the very bottom of your list page for browsing to all your lists

or the search field in the lists page for searching a list by name.

Products
You can handily retrieve all the products you have manually added to your lists (1) as well as your most used products (2) from this Products page.

Read more about the Product page here.
Bookmarklet
If you want to add a shop which does not provide a feed yet or you search for a product and it doesn’t appear on your search, you can just add them to your list directly from the website through the Bookmarklet.
To use the bookmarklet, go to the top menu and drag it to your bookmark bar:

When you are on a shop/site, click on it and it will open a window to add the link. Normally all the fields should be pre-filled but you can click on the image to choose another one or just highlight some text on the page to change the title. For the functionality of the bookmarklet, you can also see here.
One of the main strengths of this app is that you do not need to actually create the affiliate links. As soon as you go to a shop and add a link, you can use it normally. When someone clicks on the link, the system will automatically convert it to an affiliate link.