How to Add TimeStamps in a YouTube Video Description
As a crafter, you want to create video tutorials for your audience that are as detailed as possible to provide a thorough exploration of a topic. However, at the same time, you need to give them the best information fast. But how can you combine those two together?
Using timestamps for key moments in a video description, you can make your videos scannable so viewers can quickly find and click on the content they need when searching. The same way you can skim through a text to find a section of a topic, you can help people find specific information within a video by placing timestamp links.
What exactly is a timestamp
A timestamp is a clickable link to a specific part of a YouTube video; Timestamps are found in the description beneath the video. Rather than waiting for a complete video to run from zero seconds to the point you want to, the timestamp feature enables a direct link to any second of the video. This gives viewers the ability to jump right to the information that is relevant to their search with a click.
Why timestamps are useful
Timestamps make your YouTube video user-friendly, more informative, and searchable. This is very useful especially when a video has multiple steps or it's too long. It also works great in tutorial videos that contain content created for beginners as well as advanced people who usually are seeking out specific information.
Timestamps are also great for SEO and can really help if you want to improve the viewing results and optimize your video performance on Google and YouTube. They provide better-focused traffic as the relevant sections appear underneath the search engine results.
How to use Timestamps in a LinkDeli product list
Timestamps are an easy and helpful feature that you can use in your Linkdeli products list to help people find the point of the video you showcase the product they are searching for.
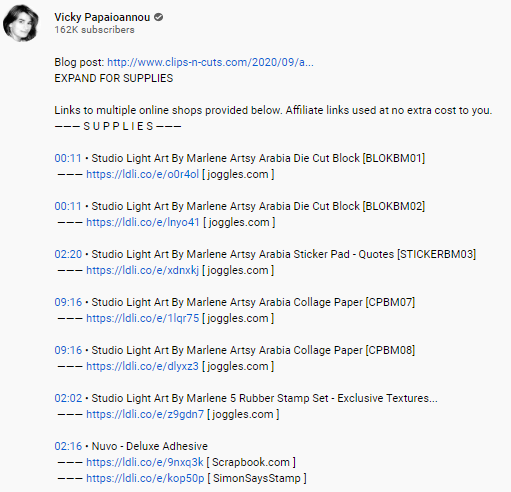
To see an example of the LinkDeli timestamps in action, click here.
Now, you have got a sense of what the timestamps are, let's see how easy it is to place some timestamps for your LinkDeli product list on Youtube.
Install the LinkDeli Timestamp extension
To start placing timestamps in the video description nearby your affiliate links, you need to install the TimeStamp extension on your browser (note: the LinkDeli Timestamp extension is currently available only on Chrome browser).
Check out our tutorial video to learn how you can install it or follow the steps below:
1. Download the LinkDeli Extension.
2. Save the file on your computer and extract it.
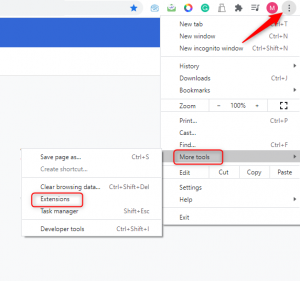
3. Open a new tab on Chrome and search for chrome://extensions (or click on the 3 vertical dots at the top right, select More Tools> Extensions).
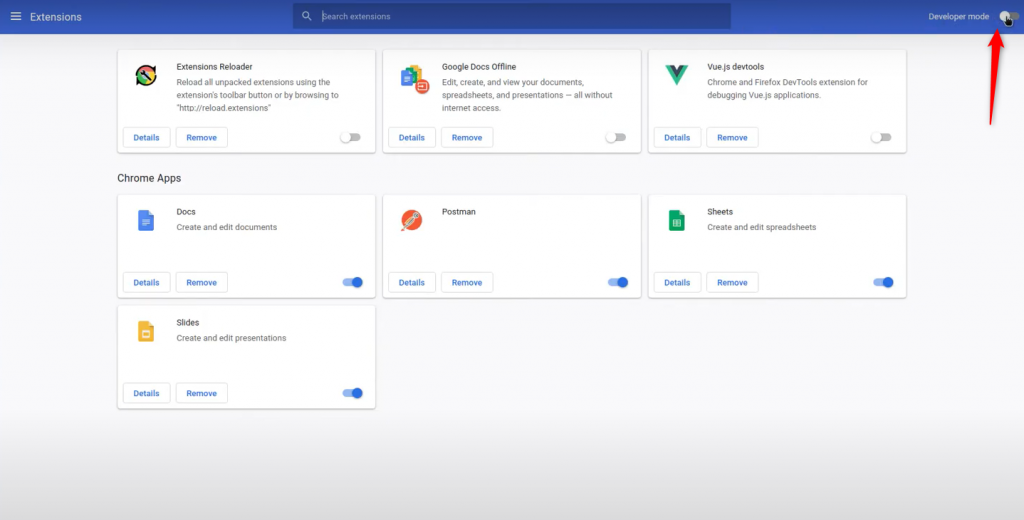
4. Switch to the developer mode.
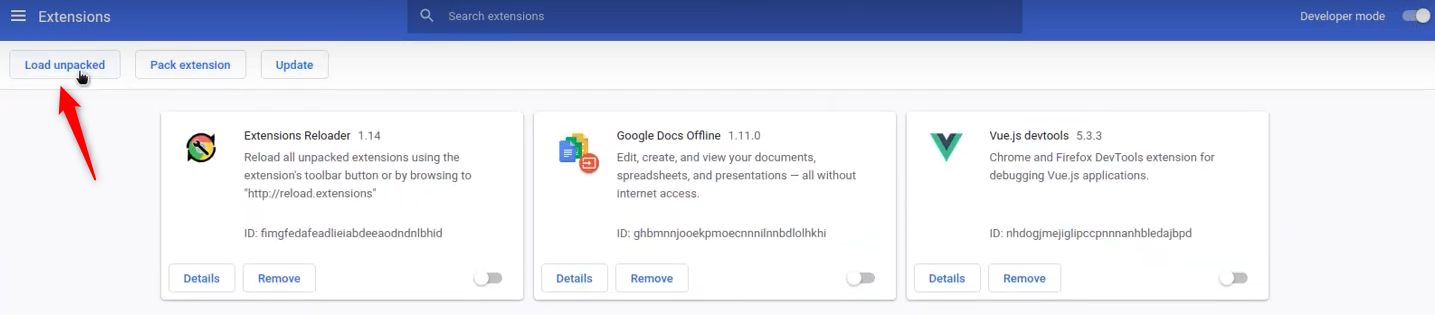
5. Click to load the unpacked file.
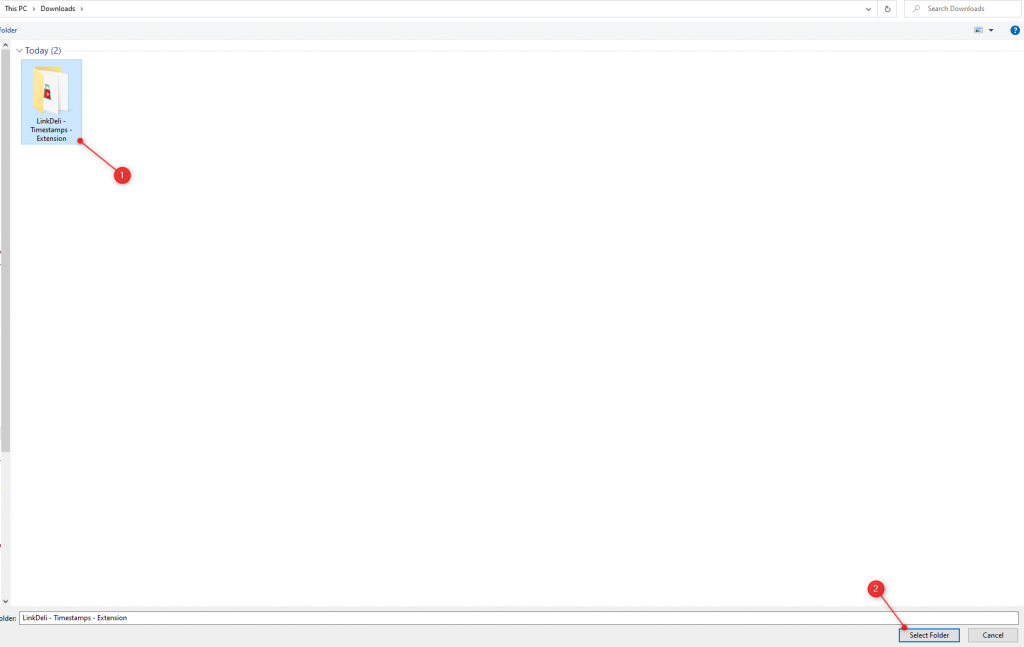
6. Find the saved file on your computer and click to select the folder.
7. Once you have installed the LinkDeli extension on your browser, you can enable the timestamps in any video description.
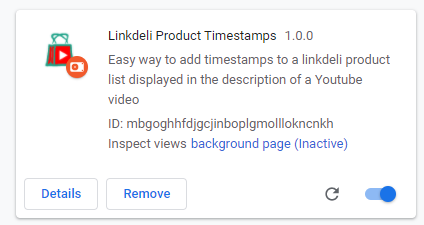
Note: If you finished enabling it, but don't see the icon on the right of your address bar, it's most likely "hidden" in the Chrome menu. To show it on your address bar, find a puzzle icon at the top right, open it, and pin the Linkdeli extension. It should work.
How to timestamp your Youtube videos.
Here is how you can timestamp a LinkDeli product list in a video description.
1. Create your LinkDeli list as usual.
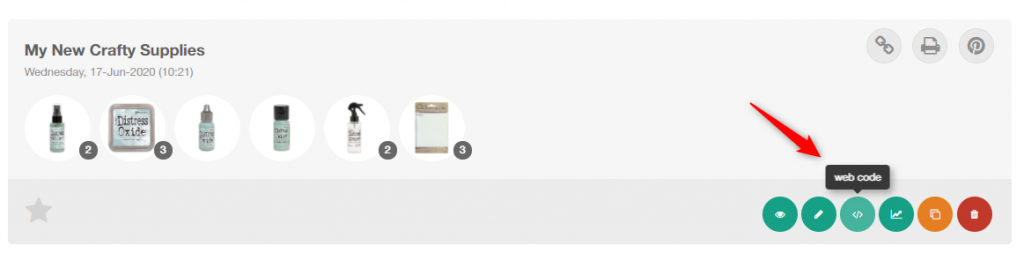
2. Click on the web code button and select to copy the YouTube code.
3. Log in to YouTube and navigate to the ‘Description’ field on a new or pre-existing video.
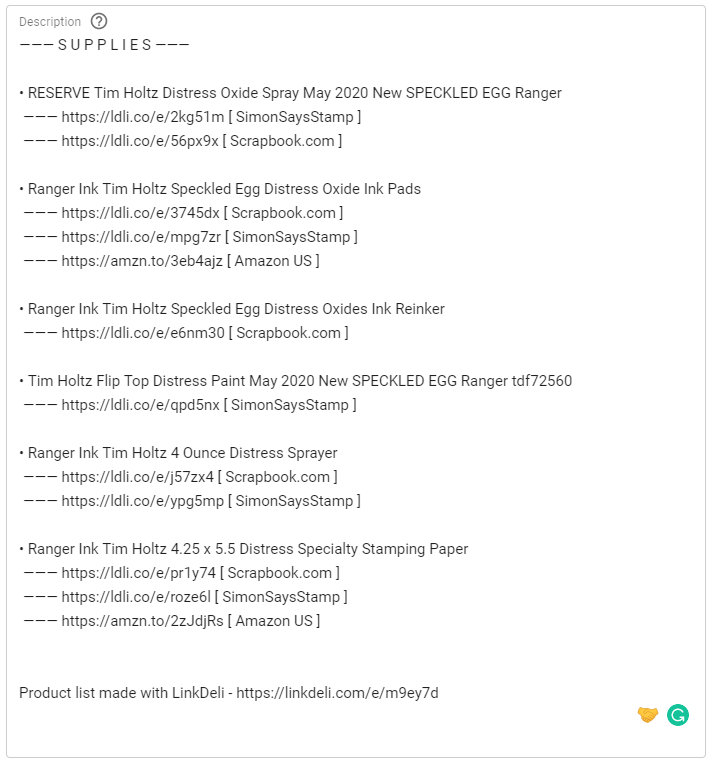
4. Paste the Linkdeli Youtube code in the description field.
5. Click on the LinkDeli Product Timestamps extension icon on your browser to enable the timestamps.
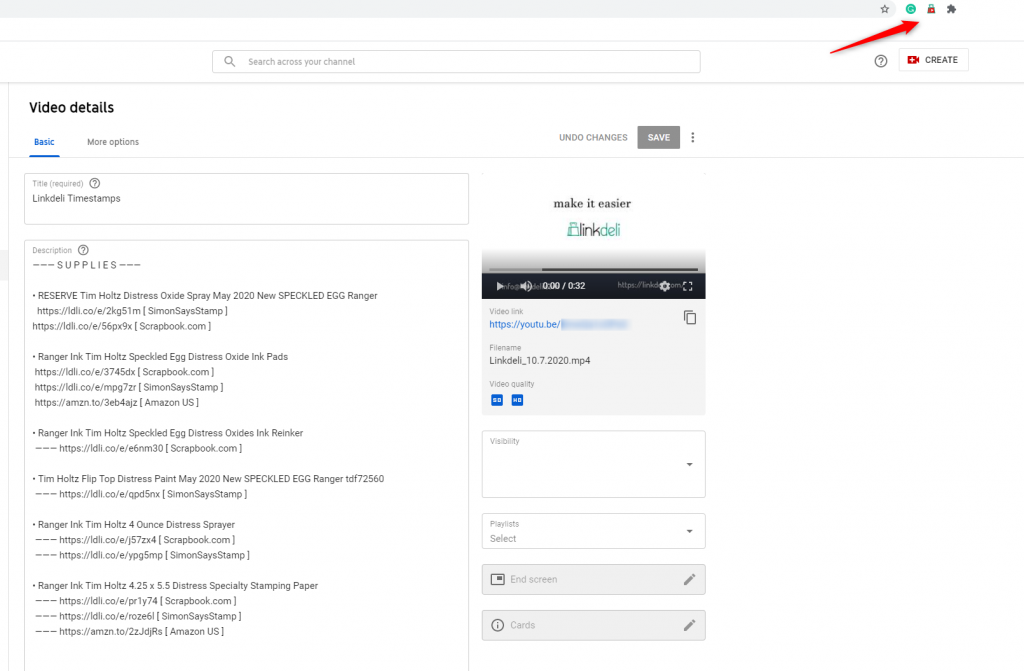
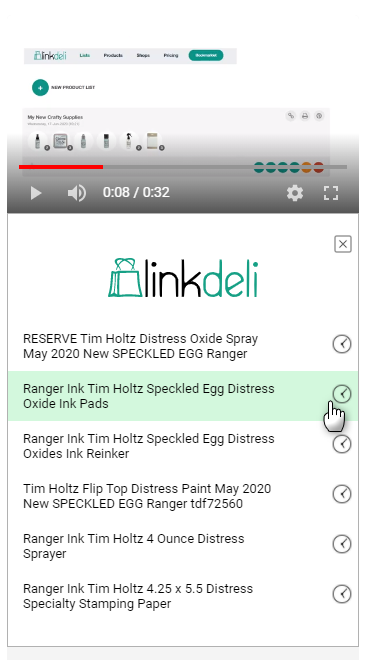
6. Start running the video and once you find a spot you want to add a timestamp for, click on the respective product on the right list to set the timestamp.
Tip! Make sure that the first timestamp you list starts with 00:00 to benefit your video SEO.
7. Once you set the timestamp, a time segment in minutes: seconds will be displayed in the respective product link.
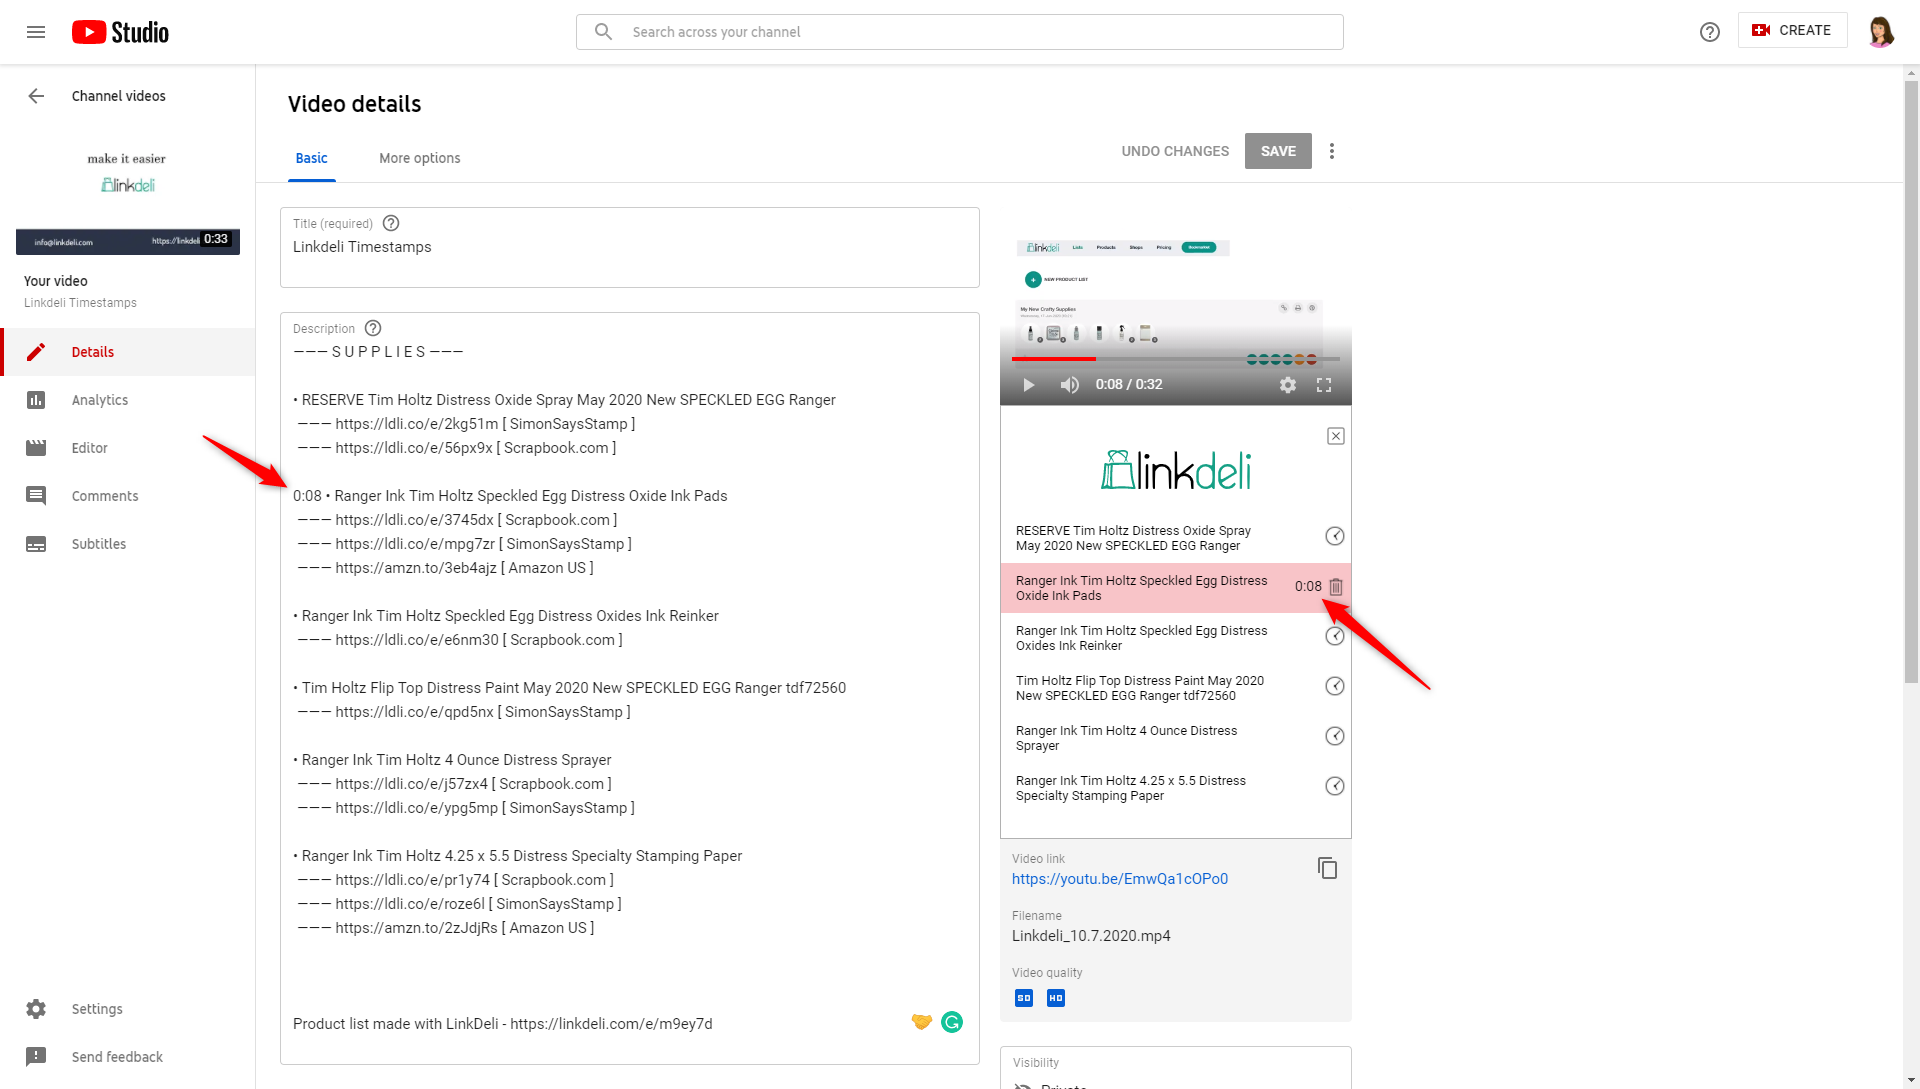
8. Repeat this process for the rest of your video, adding more timestamps for your affiliate product links.
9. Save the video and the description section will be updated accordingly.
Simple! This way your video is scannable and your followers are able to find quickly where the golden nuggets of the content lie!
(Note: If the save is not enabled, click the bar space inside the description box once. That will do the trick :)